|
Teach a Biology Lesson
|
Previous Top Next |
|
|
| Use MyScreen for School
|
| MyScreen can be used by teachers and students to turn "look-at-this-information-on-the-computer lessons" into lessons that will allow, and could even require, active participation and manipulation.
|
|
|
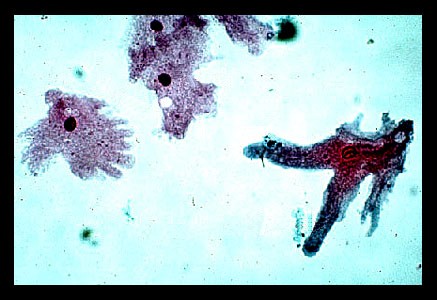
| This example uses MyScreen to focus student attention on different parts of an slide specimen that has been projected on a large screen from the teacher's computer.
|
|
|
| One:
|
| Project an image of a slide's contents from your computer or from a microscope fed through your computer.
|
|
|
|
|
| Two:
|
| Activate annotation mode and use MyScreen's Text style to add to a list of amoeba parts.
|
|
|

|
| Three:
|
| Imagine a box around the nucleous, put your mouse pointer in a corner of that imaginary box, and then drag diagonally to the opposite corner of the imaginary box. What you should be left with is a marquee of "marching ants" around your selected area. If you need to reselect, just click anywhere on screen outside of the marqueed area and start again.
|
|
|

|
|
|
|
|
| Four:
|
| Use the toolbar Zoom in button |
|
|
|
|
|
| Five:
|
| Drag the Floating Marquee to the right so that it is positioned next to its text label. Click the toolbar Float button |
|
|

|
|
|
|
|
| Six:
|
| Repeat steps 2-5 as necessary to complete your discussion.
|
|
|

|
|
|
|
|
|
|
| Seven:
|
| At this point you could print the screen you've created as a handout for the class to use for review and reference. You could also save the screen to a file on your computer for your future review or reference.
|
|
|
| If you save the file, you can use it as a review exercise by hiding/erasing the zoomed details and using MyScreen to "connect the dots".
|
|
|

|