|
Save/Print Multiple Images from a Website
|
Previous Top Next |
|
|
| Use MyScreen to Save All That You Want to Save
|
| MyScreen lets you save and print multiple pieces of website information on one printout.
|
|
|
| Many images on the Web are copyrighted material. No software can grant the right to capture or copy others' copyrighted work. If you are not sure about the legality of capturing something from someone else's webpage you should either not capture it or contact the owner of the webpage to ask permission.
|
|
|
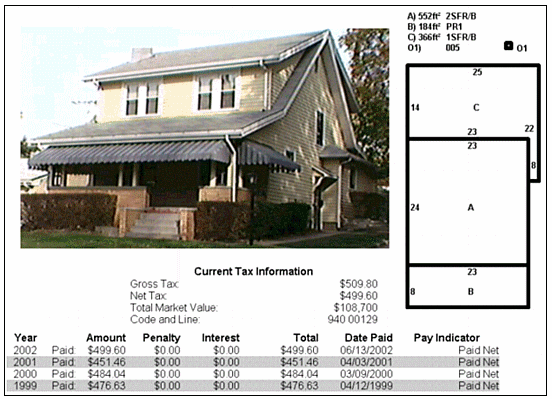
| In this example a user is using the Web to research potential new homes. He'd like a one page printout of the information he's found but that information is from several different pages on the real estate website.
|
|
|
| One:
|
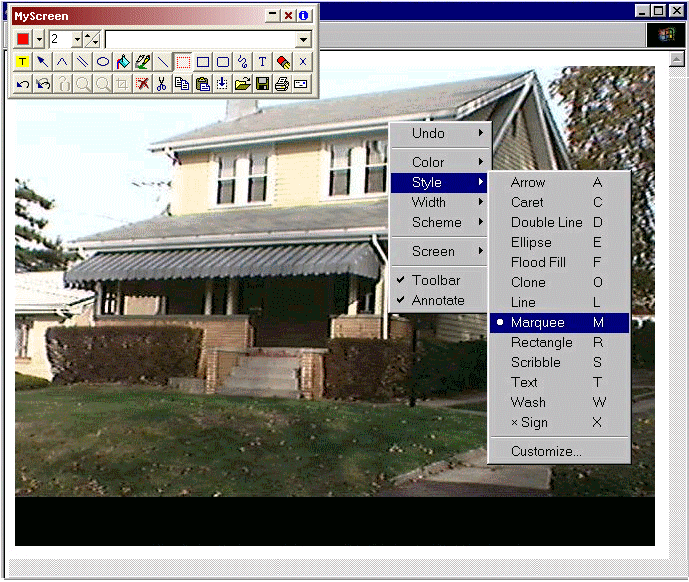
| With the desired item visible on screen, activate annotation mode and select the Marquee style if it is not already selected.
|
|
|

|
|
|
|
|
| Two:
|
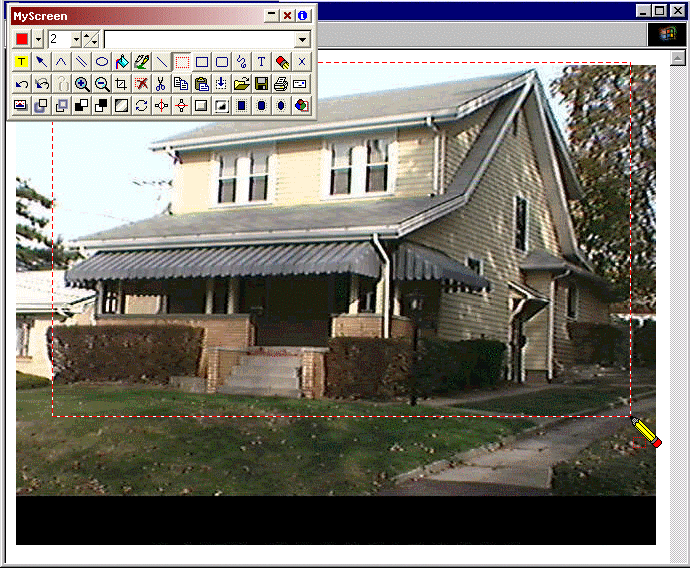
| Imagine a box around what you want to make a separate image, put your mouse pointer in a corner of that imaginary box, and then drag diagonally to the opposite corner of the imaginary box. What you should be left with is a marquee of "marching ants" around your selected area. If you need to reselect, just click anywhere on screen outside of the marqueed area and start again.
|
|
|
|
|
|
|
|
| Three:
|
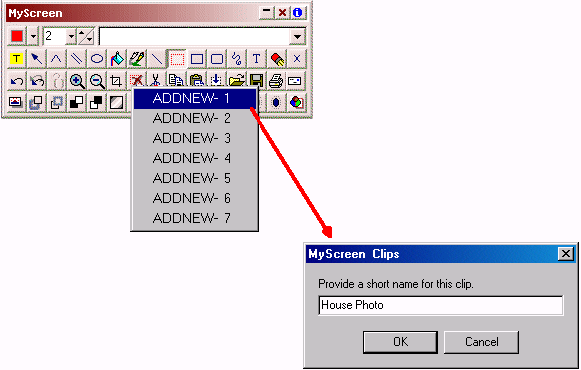
| Rightclick the toolbar Copy button |
|
|
|
|
|
| Four:
|
| Repeat steps 1-3 until you are finished storing the pieces of the website that you wish to print on one page.
|
| Five:
|
| When you are ready to put all of your stored clips together on one page, activate annotation mode and press the Delete key on your keyboard to erase/clear the screen.
|
| Six:
|
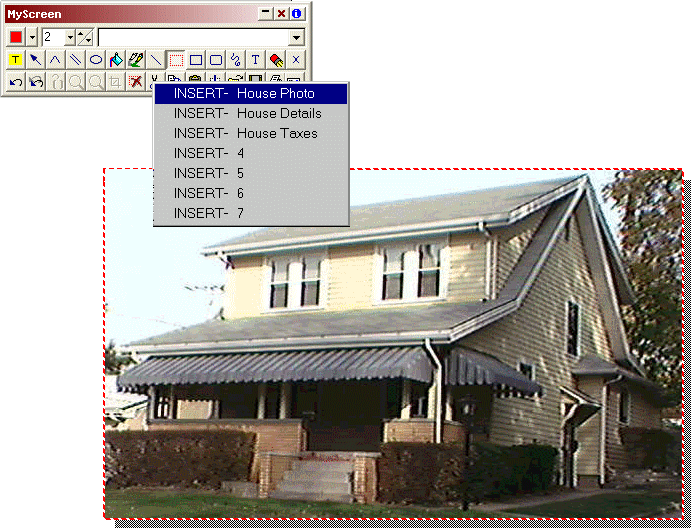
| Rightclick on the toolbar Paste button |
|
|
|
|
|
|
|
| Seven:
|
| Repeat step 6 until all of your clips have been added to the screen.
|
|
|
|
|
|
|
|
| Eight:
|
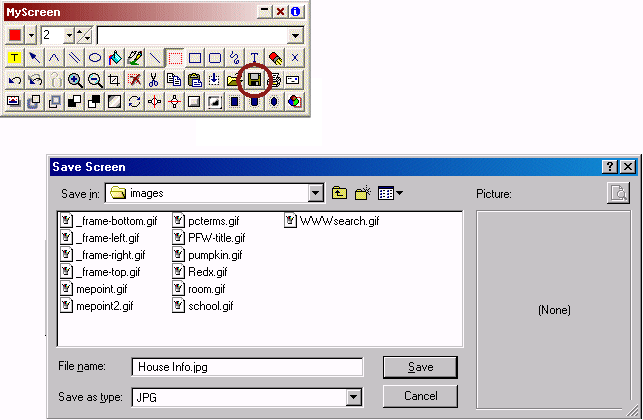
| Use the toolbar Save As button (pictured) or the rightclick menu Save As... command to open the Save Screen dialog box. Navigate to a folder as necessary, type a name for your new image file, choose a file type to save as (GIF, JPG, or PNG for the web) and then click the Save button. Depending on your choice of file type, you may be presented with further options for saving.
|
| -or-
|
| Click the toolbar Print button |
|
|
|
|
|