|
Here is how a properly retensioned pedal should look after you leave it in heel-down postion. Note that the pedals I work on are old. A new pedal should leave heel-down like you see in the photo straight out of the box.
|

|
|
Common lore says that you need to remove the treadle, bend/flatten the tension strip, and then put it all back together. This is the hard way as I've come to find out.
|

|
|
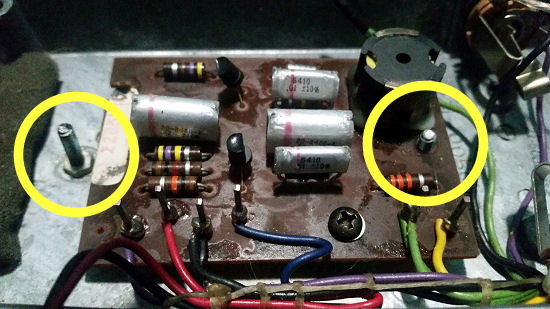
These screws are the key. This is the screw at the front of the pedal |

|
|
These screws are the key. This is the screw at the rear of the pedal |

|
|
Here the treadle is off and you can see how the screws keep the tension strip locked down over the axle of the treadle. The harder the lock down the stiffer the rocking. I first did it this way and then after a lot of work got little improvement. |

|
|
So far, I'd been working on the top of the chassis. I don't know how I got to thinking about this, but I looked at the underside of the chassis at the nuts that are attached to the tension strip screws. I found that tightening the nuts will increase the tension and keep the Rocker where ever I leave it. AND, it is ridiculously easier than the hard way to do it.
|

|
|
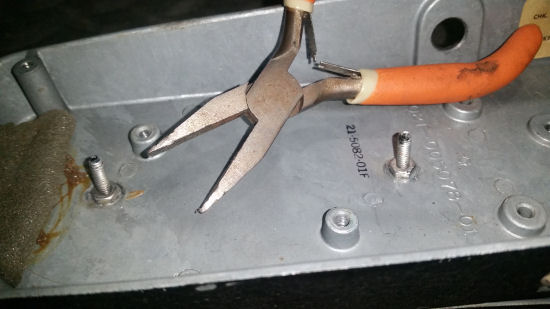
Use a pair of pliers, or a deep socket wrench socket, or some other tool to tighten the nuts. I feared when I tried this that the screws would just rotate with the turning and never get to tighten anything. But the screws are under such pressure from holding down the tension strip that they did not rotate when I turned the nuts. I put a black mark on the screw posts to make sure that the screws were not rotating. If the black mark didn't move, and it didn't, then the tightening of the nuts would only tighten the nuts and not rotate the whole screw. |
|
|
Here the ends of the screws and their respective locations are visible. When you try this, see what tightening the nut on the left first does for you and maybe that will be all that you need.
|
|
|
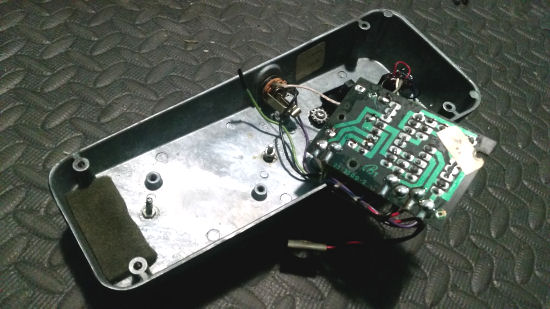
Or, you may need to get to the nut on the right side. You will need to remove two screws to lift the circuit board out of the pedal. Now you can see all of the right hand tension screw. Note that this right hand screw has two nuts on it. The top one is for the circuit board to rest on. Remove it and put it in a safe place so you can put it back when we are done retensioning. Now you have access to the nut on the right.
|
|
|
Put everything back in place and there you are.
|

|
